12 December 2012

Eggnog Snickerdoodles & the Great Food Blogger Cookie Swap 2012

This is the second year I've participated in the Great Food Blogger Cookie Swap and I've really come to love it. This year to participate in the cookie swap, bloggers were asked to donate 4 dollars to Cookies for Kids' Cancer, a non-profit organization committed to help funding new therapies that fight against pediatric cancer. Moreover, one of my favorite in-the-kitchen brands, OXO, got involved. OXO is donating 50% of proceeds from their adorable spatula AND is matching the proceeds earned from the FB Cookie Swap and donating it all to Cookies for Kids' Cancer.


So not only was this cookie swap a ton of fun to participate in, but it could not have been for a better cause!

With just over a week left in the semester, I truly looked forward to and appreciated coming home to shipments of cookies! This year I received delicious Tahini Butter Cookies from Annelies, at the Food Poet, Brown Butter Shortbread Cookies from Aaron, at the Hungry Hutch, and Moroccan Sesame Cookies from Amanda over at MoracMama. All three cookies were enjoyed on my own before deciding enough was enough and that I should probably share the wealth with my labmates at work. I'm sure my waistline will thank me for this decision in the long run, but my sweet tooth tonight sure is regretting it!

For the cookie swap, I knew I wanted to embrace seasonal flavors and do a twist on a classic cookie. In the end, I went for incorporating the rich, spiced flavors of eggnog into a classic cookie - the snickerdoodle!

Eggnog Snickerdoodles
Based on Joy of Baking's Snickerdoodles

Yields: 36-40 cookies

Cookie Ingredients

  • 2 3/4 cups all purpose flour (or half all purpose, half whole wheat baking flour)
  • 1/2 tsp salt
  • 2 tsp baking powder
  • 1 c unsalted butter, room temperature
  • 1 1/2 c granulated sugar
  • 2 large eggs, room temperature
  • 1 tsp pure vanilla extract
  • 1/2 tsp cinnamon
  • 1/8 tsp nutmeg
  • 1/3-1/2 c, whole fat eggnog

Coating Ingredients

  • 1/3 c granulated sugar
  • 2 tsp ground cinnamon


Directions

  1. In a large mixing bowl, cream together the butter and sugar on medium speed for 2 -3 minutes. Scrape down the sides of the bowl.
  2. Once sugar and butter have been creamed together, mix in the eggs one at a time, scraping in between additions. Afterward, mix in the vanilla extract. 
  3. In a medium sized bowl, mix together your dry ingredients. Fold the dry ingredients to your wet mixture.
  4. With your stand mixer or hand beaters on low, pour the eggnog into the cookie dough. If you're using whole wheat flour, you'll want to add closer to 1/2 c of eggnog. Cookie dough will be sticky at this point, so scrape down the sides and pop it into the refrigerator for at least two hours or until firm.
  5. Once cookie dough is firm, preheat your oven to 400 degrees Fahrenheit. Set up your work station with your metal cookie sheets lined with parchment paper and sprayed with your favorite non-stick cookie spray or lined with Silpat sheets. In a small bowl, you'll want to have your sugar and cinnamon mixture. You'll also want a small, circular cup that you can press your cookie balls down with. 
  6. Spoon it 1-1 1/2" balls of dough. Roll the balls into the sugar coating before pressing down with the cup. To keep the cup from sticking, occasionally rinse the cup off with clean water. You should aim for fitting 15 cookies on a pan.
  7. Bake the cookies in the oven for 8-10 minutes. Keep a careful eye on the cookies and make sure that they are baking evenly. If your oven is as fickle as mine, you might want to rotate the pans while the cookies are baking. You also should keep an eye on the centers of the cookies to make sure they're baking all the way through, and watch for the bottoms of the cookies browning before cookies are actually done all the way through! (If this happens, try covering your cookie pan with tin foil while those cookies finish baking in the oven. Just be careful not to have the tin foil touch up against the cookies.)
If you are super ambitious, I would love to see someone try drizzling a salted bourbon caramel sauce over these cookies. I actually had bought all the ingredients for the sauce, but ran out of time! With all of the ingredients sitting in my cabinets, I have the perfect excuse to make the cookies over again, but I hope that it also inspires one of you to try out something new and make it your own!


Happy holidays, folks!
Caitlin


03 December 2012

Eggnog and Cranberry Bread Pudding with a Hard Bourbon Sauce

Excuse me while I channel my inner Liz Lemon while I go "What the whaaaaat!?" Two posts in one day? Could it be so!?

Well, yes, yes it could be. I'm serious when I say that I buy wholeheartedly in to seasonal flavors. I was all about the pumpkin earlier this year (and still am, actually), but as of recent it's like there's a little voice in my head whispering 'eggnog' to me throughout the day. It's torturous, I swear! And with no roommates, I have no one to tattle on me if I were to polish off a bottle in a day. My waistline might tell a different story, though. Anyway, that's neither here nor there, so let's get to the good stuff!


Eggnog and Cranberry Bread Pudding with a Hard Bourbon Sauce

Adapted from some recipe my mom has coveted as her own for years. I don't know which cookbook it's from, but I would wager a bet on the Silver Palette or one of David Wood's cookbooks. (Also, I bet this vanilla bourbon cranberry sauce would be absolute money with this bread pudding if you made it more compote-style, but that's for another day!)

Bread pudding ingredients
  • 8 tbs butter, room temperature
  • 1 baguette or challah bread (enough to yield 4 c of cubed bread)
  • 1 cup heavy whipping cream
  • 1 cup whole fat eggnog
  • 4 large eggs
  • 1 tsp vanilla
  • 1/4 cup bourbon
  • 1/2 cup plus 2 tbl sugar
  • 1/4 tsp ground nutmeg
  • 1/4 tsp salt
  • 1/3 cup fresh cranberries
Hard bourbon sauce ingredients
  • 1/2 cup sugar
  • 2 large egg yolks
  • 5 tbl bourbon
  • 4 tbl (1/2 stick) unsalted butter, cut into 1/2 tbs pieces
Directions
  1. Cut off the ends of your carbalicious vehicle of choice. Next, cut the carbs into one inch cubes (or smaller). Butter each of these little puppies on all four sides. That's right, ALL FOUR SIDES. This should require at least one stick of butter and no, I'm not kidding.
  2. In a large bowl, whisk the cream, milk, eggs, vanilla, bourbon, 1/2 cup of the sugar, nutmeg, and salt until blended.  Add the bread cubes and toss until evenly coated.
  3. Refrigerate the pudding for at least 2 hours, occasionally tossing the mixture with a large spoon (or your hands, don't be afraid to get messy) to make sure all the cubes are getting their fair share of eggnog bourbon goodness.  
  4. Fifteen minutes before baking, preheat the oven to 350'F.  Grease an 8-inch square baking dish with butter.  Add the cranberries to the pudding, toss, and then pour the pudding into the baking dish.  Sprinkle the remaining 2 tbl. sugar over the top of the pudding.
  5. Bake the pudding on the center oven rack until the top is crisp and golden, and has risen in the center, about 50 minutes.
  6. While the pudding is baking, now is your time to make some bourbon sauce! Start by putting a small sauce pan filled with 3/4" to an 1" of water on the stove and whisking together the egg yolks and sugar in a container that can be used as the top of a double boiler. (I usually go for a small glass (Pyrex) bowl that I later put on top of said small sauce pan.) You'll want to whisk until the mixture is a light yellow color, which will take 2-3 minutes. Afterward, go crazy and whisk in the bourbon!
  7. Once the water is simmering and your sauce is mixed, add the bowl/top off of the double boiler to the heat. Cook, whisking vigorously, until the mixture is hot and slightly thickened, 5 minutes.
  8. Remove sauce from heat once the mixture has thickened, add the butter slices one at a time, and stir until all of the butter has melted. 
  9. Serve the sauce warm over the bread pudding.  If you prepare the sauce ahead of time, reheat it in the microwave, heating it one minute at at time and stirring in-between heating sessions. 

Browned Butter Pumpkin Trifle

Oh noes, I failed to post a recipe in the past month. Well, I'm going to make it up in the next two weeks, starting with this post! I'm all about whatever is fresh or resonates with how the weather makes me feel, so this past fall I made a pretty outrageous brown butter pumpkin trifle with maple whipped cream and toffee crunch. (can I say it's in the past now? It feels an awful lot like a balmy spring day right now) The trifle definitely hit the spot and did a great job at feeding my obsession with pumpkin-flavored anything! 

Let's get down to business now, shall we?

Trifles are awesome. If your cake doesn't come out of your pan cleanly, then chop it all up into little bite size chunks and layer it with some other good stuff. Trifle usually consists of some cake and whipped cream, but additions of fruit, sauces, and candy are also welcome. This dessert comes together really well and looks gorgeous, when really it's just about the least time consuming construction possible. Trifles are shown off best in an trifle bowl, but any sort of tall glass container could be substituted.

Browned Butter Pumpkin Trifle

(built upon Willow Bird Baking's Browned Butter Pumpkin Cheesecake with Salted Caramel recipe)

Cake ingredients
  • 3/4 cup pumpkin puree
  • 3/8 cup (6 tablespoons) unsalted butter
  • 1 cup unbleached all-purpose flour
  • 3/4 teaspoon baking soda
  • 3/4 teaspoon ground cinnamon
  • 1/2 teaspoon ground ginger
  • pinch table salt
  • 1/8 teaspoon ground cloves
  • 3/4 cup granulated sugar
  • 1/3 cup firmly packed light brown sugar
  • 1 large egg
  • 2 tablespoons and 2 teaspoons buttermilk
Topping ingredients
  • 1 pint heavy whipping cream
  • Maple syrup, to taste
  • 3 large heath bars 
Directions
  1. Preheat oven to 350 degrees Fahrenheit. Grease two 8 or 9-inch circular pans with butter. Line the bottom of the pans with parchment paper. 
  2. Melt the butter in a sauce pan on medium, stirring occasionally. Once brown flecks begin to appear in the butter (3-5 minutes) and aroma becomes nutty, remove from heat. Continue stirring as butter cools to room temperature (another 5 minutes).
  3. Mix together the pumpkin puree, granulated sugar, brown sugar, egg, and buttermilk until well combined. 
  4. Fold in the dry ingredients into the wet mixture. Stir in the brown butter. Pour batter evenly into your two pans.
  5. Bake the cake until a toothpick comes out clean or with few moist crumbles attached. This should occur between 25 and 30 minutes, but all ovens vary so be sure to test your cakes with a toothpick!
  6. Remove cake and allow to cool in the pan for 15 minutes before flipping out onto cooling racks. Allow cakes to come to room temperature.
  7. While cakes are cooling, chop up the health bars into small chunks. If you're feeling fancy, you can try shaving some curls to top the trifle with, but otherwise little chunks are just fine. During this time, you'll also want to make the maple whipped cream. You'll want to pour at least a cup of heavy cream to start into a bowl and use a hand or standmixer on high until the cream begins to form stiff peaks. Once it does, feel free to start drizzling in maple syrup. Just drizzle the syrup in a tablespoon at a time while the mixer is going and taste it for flavor. If you want it sweeter, go for a few tablespoons of maple syrup. If you just want a hint of flavor, then one or two tablespoons should be all you need.
  8. Once cakes have cooled, cut cakes into small one inch chunks. 
  9. With all of your ingredients ready, start layering! I layered first with cake, then with topping, and last with heath bar, repeating until I ended with heath bar, but it's really up to you. 

Now that it's winter I have switched gears and made an eggnog bread pudding with cranberries. There's still eggnog in the fridge, so maybe more eggnog recipes will come in the future... or maybe I'll just finish it on my own with the help of a little Jim Bean or amaretto. Only time will tell! Check back soon for the eggnog bread pudding recipe (and seriously people, harass me until I post the recipe).

30 October 2012

Sweet Potatoes and Black Beans

After traveling for two weeks, I can't get enough of being in the kitchen and eating healthful foods. In my attempt to prepare, if not, eat, all of my accumulating CSA produce before the next share arrives, I decided to finally try out the sweet potato and black bean combo. Now while this could easily be served inside or along with the carb vehicle of your choice (rice, tacos, fajitas, enchiladas, etc.,), I've opted to serve mine on top of a bed of shredded lettuce. Come to think of it, I bet it would be pretty tasty atop nachos, but that'll have to wait until a later day.

The flavors you use to season the potatoes and beans is up to you, but the combo I present to you today is a little out of the ordinary, in a sort of, dare I say, extraordinary way. I freehanded it, though, so all of my measurements are extremely approximate. However, it's crucial that you don't omit any of the spices! Also, I should draw your attention to the fact that the recipe that follows is meant to serve one, because I made it fresh for dinner. I can't say to whether it would reheat well, but I'm certain it could be made in larger quantities quite easily!

Sweet Potatoes and Black Beans

Ingredients

  • 1/2 tbs vegetable oil
  • 1/4 cup onion, minced
  • 1 cup sweet potato, diced into quarter inch chunks
  • 1/2 cup drained, but NOT rinsed, black beans
  • Two or three shakes of chili powder
  • Three or four shakes of cumin
  • One to two dashes of cayenne pepper for mild heat (go crazy, if you want!)
  • One to two shakes of dried parsley
  • Liberal amounts of salt and pepper 
  • A dash of cinnamon
  • 1 oz (or more) of shredded Monterey and Colby Jack cheese (optional)
  • 1 cup of shredded lettuce (optional)

Directions

  1. Heat oil in a small- or medium-sized pan on medium.
  2. Once oil has small bubbles form within it, add in minced onion.
  3. Allow onions to crisp up and brown before adding in the sweet potatoes. Cover the mixture with a lid, and allow the sweet potatoes to steam up.
  4. In 3-5 minutes, check the sweet potatoes with a fork. Once a fork is easily able to prick the potatoes, add in the black beans and stir.
  5. Season the mixture with salt, pepper, cumin, chili powder, cayenne pepper, cinnamon, and parsley, before stirring and putting the lid back on for another 2-3 minutes. (You should add more cumin than any other spice, followed by chili powder, salt and pepper, and cayenne. The other spices are crucial, but as subtle flavor notes!)
  6. While the mixture is finishing cooking, prepare your plate as desired. I put a layer of shredded lettuce down on mine, which I then layered evenly with the mixture. Lastly, I topped it all with cheese and allowed it to melt over before diving in.

Eat your heart out, Chipotle!
(Except.. don't. I'm totally coming for your $2 Halloween burritos tomorrow!)


28 October 2012

"Why is this so good?"

No matter what you call this dip (taco dip, nacho dip, crack dip), it's undeniably delicious. It's been a favorite in my family for as long as I can remember and I'm so happy to see others loving it as much as the Roach crowd does!

Taco Dip

Ingredients


  • 1 pint (16 oz) sour cream
  • 12 oz cream cheese
  • 1 roughly chopped green pepper
  • 1 roughly chopped red pepper
  • 1 roughly chopped yellow onion
  • Taco seasoning package
  • Shredded Monterey Jack and Colby cheese or "Mexican" cheese, really whatever you're craving!
  • 2 deseeded, diced tomatoes (optional)
  • Shredded lettuce (optional)
  • Garlic powder (optional)
  • Cayenne pepper (optional)
Directions
  1. Mix together sour cream and cream cheese. It's easiest to do so when they've been sitting out for a bit and had time to soften up. You can also get the reduced fat cream cheese or whipped cream cheese, both of which tends to be easier to mix with the sour cream!
  2. Incorporate taco seasoning until flavorful enough for your liking. I usually use around half packet of it. I find the El Paso brand seasoning (I think that's the name.. it comes in a yellow packet) weaker than the Ortega brand (comes in a blue packet), though, so feel free to taste as you mix! 
  3. Store and chill this mixture until right before assembly/consumption. No one wants soupy dip
  4. Spread the taco seasoned cheese mixture into the bottom of a 9x13" pan evenly. If you desire, lightly top with garlic powder and cayenne pepper for an extra kick at this time.
  5. Layer selected vegetables on top of mixture.
  6. Top with shredded cheese. 
  7. Dig in with a serving vehicle of your choice (chips and hard, crunchy vegetables are advisable). 
p.s. The combo of cheese and taco seasoning are what make this a winner, but really anything that combines those are good in my book. In fact, I think I'll use the leftover seasoning and cheese with some black beans and call it dinner! 

30 July 2012

Dark Chocolate and Cherry Scones

If you follow me on Instagram (chopsticksandmeasuringcups) then you know that I do plenty of cooking and baking, so it's the following up and posting recipes (or perhaps keeping track of ingredients and measurements) that's not my forte these days. I have a solution, though! I think you all should probably just feel free to stop by my apartment and try all of the food that's coming out of my kitchen first hand. Seriously, though, someone needs to hold me better accountable to writing up recipes! Who knows what will happen once year 2 of grad school starts up..

Anyway, I do have quite the recipe for you today. Scones have been floating around my Google reader and given that I'm going down my aunt's in the Cape where we always have a buffet of breakfast pastries, it just seemed like the right time to make some scones of my own! These are adapted from a Weight Watchers' friendly blog, which is particularly convenient given I'm going to stuff my face with them right before heading out onto the beach. I changed around the flavors to satisfy a craving I've had for Ben & Jerry's Cherry Garcia, but definitely still try out the original recipe which is more oatmeal raisin themed!


Dark Chocolate and Cherry Scones
Recipe adapted from Eat Yourself Skinny's Cinnamon Raisin Scones

Yields 12 moderately sized scones, or 8 "restaurant" sized scones

Scone Ingredients
  • 2 cups white whole wheat flour or whole wheat pastry flour
  • 1/4 cup light brown sugar, packed
  • 3 tablespoons baking powder
  • 1/2 teaspoon salt
  • 3 tablespoons cold butter (I'm talking straight from the fridge, has no give, type of cold butter!) 
  • 1/4 cup skim milk
  • 2 teaspoons vanilla extract
  • 2 eggs, lightly beaten
  • 3/4 teaspoon cinnamon
  • 1/2 cup rehydrated dried cherries (Fresh would be wonderful, but I didn't have any on hand!)
    • This can be done by letting dried cherries soak in 1/4 cup hot water for 5 minutes or by microwaving them in a bowl with 1/4 cup water for 1 minute. Either way, drain the excess liquid! 
  • 1/4 cup dark chocolate chunks or semi-sweet chocolate chips
Glaze Ingredients
  • 1/4 cup semi-sweet chocolate chips
  • 1 tablespoon vegetable oil, coconut oil, or shortening (optional, but highly recommended to get a nice shiny glaze)
  • 1/8 teaspoon cayenne pepper 
  • 1/4 teaspoon cinnamon
Directions
  1. Preheat oven to 400 degrees Fahrenheit. In a food processor, pulse together until just incorporated the dry ingredients (flour, sugar, baking powder, salt, and cinnamon). 
  2. Cut the butter into 4 or 5 smaller wedges and pulse into dry mixture. 
  3. One at a time, pulse milk, vanilla extract, and eggs into the mixture. Each addition of a wet ingredient, you should only need to pulse once or twice. At the end, the mixture should have begun to clump together and form a dough. 
  4. Pulse in cherries and half of the chocolate until batter is flecked with little pieces.
  5. Fold in remaining chocolate.
  6. On a well floured flat surface and with hands coated in flour, remove dough from food processor and form a disc 9 inches across. (The disc will be between half an inch and an inch thick, but don't worry! It will bake up in the oven.) Transfer disc onto a buttered and floured cookie sheet or other flat baking sheet for actual baking.
  7. With a liberally buttered (or non-stick sprayed) pizza cutter, divide the disc into desired proportions. I would recommend either 8 or 12 divisions. 
  8. Bake in the oven for 15 minutes or until the top is golden brown all around. Remove and let cool completely.
  9. While scones are cooling, in a small sauce pan heat chocolate chips with the oil of your choice. Alternatively, you can melt the two in the microwave for a minute. Just check the microwave every 20 seconds or so or the chocolate could burn. 
  10. Once melted, stir in the cayenne pepper and cinnamon.
  11. When the scones are completely cooled, drizzle sauce over top the scones, serve and enjoy!

These scones come in at 6 WW+ points. They make a great midday treat with a coffee pick me up or even could be served alongside some scrambled egg whites for quite the respectable breakfast! Of course, feel free to play around with the recipe- you might be interested in trying include subbing in a mixture of half oat flour (made simply by pulsing quick or old fashioned oats in the food processor) with half all purpose white flour. You could also use fresh cherries if they're local and in season where you are. Any way you have it, please do enjoy!

18 June 2012

A Burnt Ring Finger & Brown Sugar to the Eye

I must have a case of the Mondays. It's the only thing I can think of that would result in upping my all time injuries in the kitchen tally from two to four in one day. First, I accidentally tipped a pot of freshly cooked rice vermicelli into the sink. What was my next thought process? Oh, let's scoop them all up with my bare hands! Folks. Don't do that. It's a TERRIBLE idea. Then just now, I somehow flung brown sugar all up on my shirt, my hair, and in my eyes! Crazy, I know.

However, at least these mishaps led to hearty eats! I now have lunch (or dinner) set through Friday-- Asian noodle stir-fry filled with soft tofu, sugar snap peas, and zucchini. Continuing with the zucchini trend, I went and tried out a new zucchini bread recipe and a "secretly healthy chocolate cake" recipe.

I made very few modifications to the recipes, but so that you can keep track at home here are my baking notes!

Zucchini bread (16 servings, 4 WW+ points each)
  • Used the oil option rather than butter
  • Used whole wheat flour instead of AP
  • Used fat free greek yogurt in place of plain yogurt or sour cream
  • Did not add craisins
  • Did not top with glaze
  • Will grease and flour the pan next time; a liberal coating with a non-stick spray does not get the job done with this bread!
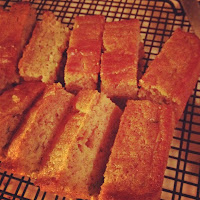
  • Yields a dense, shorter slice of bread
A great little snack that I intend on pairing
with a fresh smoothie for breakfast this week!
Dark Chocolate Zucchini Bars (9 servings, 3 WW+ points each)
  • Used all whole wheat flour instead of AP
  • Used fat free greek yogurt in place of apple sauce
  • Substituted a "chia" egg (1 tbs chia seeds + 3 tbs water) for the egg
  • Added 1/8 tsp of cayenne pepper
  • Did without the optional chocolate chips
  • Removed from the oven when the toothpick was not quite clean, so that the bars were more fudgey and brownie-like
Topped with fresh strawberry and ice cream!
And the best part of all? Not only do these treats sneak in an extra bit of vegetable to your daily diet, but you can bake these simultaneously since they both call for a preheated oven at 350 degrees Fahrenheit! Now what's stopping you? Try these recipes out!

12 June 2012

Peanut Butter and Chocolate Kissed Banana Muffins

It's been muggy and in the 70s, if not 80s, here in Happy Valley for several weeks and today I did the unthinkable. I decided to bake. The window air conditioner unit I bought is not even installed and it still seemed like a good idea to use the oven.

Luckily for me, and all of you, this recipe is worth turning on the oven and sweating for- The muffins are healthy and oh so flavorful!

As many of you may know about me, I am obsessed with peanut butter. I love it so much that the first time I went on Weight Watchers I was disgusted by how many points (the measuring system in WW) are in two measly tablespoons! I quickly found PB2, a healthy, natural alternative to peanut butter, that easily allows me twice the amount of peanut goodness for less than half the points of the real stuff. Since then, I've been meaning to try PB2 out in a baked good and now we have its debut! And my few, faithful followers, don't think that this means you have to use PB2 to make these bad boys. You can just as easily sub in the same amount of peanut butter into this recipe (though you'll want to heat it up, so it's warm, more liquidy, and easy to mix)!


Peanut Butter and Chocolate Kissed Banana Muffins
Recipe inspired by Skinny Taste's Low Fat Peanut Butter Banana Muffins

Yields 12 muffins


Ingredients
  • 2 tbsp butter, softened
  • 1/3 cup light brown sugar
  • 4 ripe medium bananas
  • 2 large egg whites
  • 1 tsp vanilla extract
  • 6 tbsp of prepared PB2 (6 tbsp PB2 mixed with 3 tbsp water) OR 6 tbsp of your favorite peanut butter
  • 1 cup whole wheat flour
  • 1 tsp baking soda
  • 1/4 tsp salt
  • 1/4 tsp cinnamon
  • 1/4 cup semisweet chocolate chips 
Directions
  1. Preheat oven to 325 degrees Fahrenheit. Line muffin pan with 12 liners, or spray pan liberally with your favorite non-stick spray. 
  2. Cream together butter and sugar. While these are creaming, peel and mash the bananas in a small side bowl. A few small lumps of banana are fine, but avoid having extraneous banana chunks on the larger side.
  3. Once butter and sugar are creamed, scrape down the sides of the bowl, then mix in bananas, egg whites, vanilla extract, and peanut butter of your choice. 
  4. When the wet ingredients are well incorporated, fold in all of the dry ingredients except for the chocolate chips. Be sure not to overmix or you'll end up with tough muffins!
  5. Pour batter into the muffin tin, filling each designated muffin area 1/3 of the way up. At this point, evenly scatter the 1/4 c of chocolate chips throughout the 12 muffins. Pour remaining batter into the pan until there's none left (or until there's just enough batter left for you to scoop out with your fingers for a taste test before you do the dishes). 
  6. Bake muffins for 25-27 minutes, or until a toothpick comes out practically clean. When storing, make sure they've cooled down entirely, even if this means you have to leave them out overnight. If you don't, you're at risk for these muffins going from perfectly cooked with a touch of undone, warm insides, to the awkwardly sticky, and dare I say it, moist, texture. Alternatively, just eat them all at once! 
Whoa, blurry, sorry about this everyone!

These muffins come in at 4 points and are great for a snack, a treat, or even to start off your day, perhaps with a bowl of fruit salad and a small side of scrambled eggs. Don't be afraid to go crazy with the filling options, either. I suspect adding in a dollop of jelly would make these muffins a great play on PB&J. You could also try using peanut butter chips instead of chocolate chips, a little ball of coconut flakes, or even mini-marshmallows! Actually, why not try a combination of all of the above?

Happy eating, folks!

11 June 2012

Slutty Cupcakes

Eek! It's been 2 days shy of a month since I last posted. Thankfully, what I have for you today consists of 3 layers of decadence. Following the slutty brownie trend that swarmed the Internet earlier this year I was inspired to transform these beauties into cupcakes. Unfortunately, I don't have any good quality pictures to show of them, so you'll have to trust me on this one!

The traditional slutty brownie begins with a layer of gooey chocolate chip cookie, followed by Oreos that have been topped with your favorite brownie recipe. In the cupcake, I decided to switch it up a bit. I used a brownie base and inserted a chilled ball of eggless chocolate chip cookie dough, so that while the brownie-cake baked, the dough warmed up and became perfectly gooey and not quite all the way done. Lastly, I went with a buttercream frosting with crushed Oreos mixed in, and then topped it all off with a whole Oreo! Whew! And along the way, I learned that brownie-based cupcakes aren't meant to be cooked using muffin/cupcake liners unless being served while still hot and easy to peel from the liner. So spray up your muffin tin and give it a good dusting with flour!

I foresee many permutations of the Slutty Brownie to comes, so check back for variations based on the infamous peanut butter & chocolate combination, as well as mint and chocolate duo.

For the brownie base, I used this recipe. I found mine took longer to cook (because there was a chilled ball of dough in the center, but of course) than recommended, so you'll want to stay close to the oven and take them out frequently to test them with a toothpick. I would say take them out when the toothpick still comes out a little gooey. Just like with regular brownies, you don't want the toothpick perfectly cool or for the brownies to look all the way cooked when they come out of the oven, otherwise once they'll cool, you'll find they've been overcooked and dry! Also important for the brownie base and the chocolate chip cookie dough is to not entirely sub out the AP flour with whole wheat flour without playing around with the wet ingredient ratio, too. Even if it's white whole wheat flour or whole wheat pastry flour, you'll find the texture is off if you do a full swap!

For the hidden chocolate chip cookie dough ball, I used another of Jen's recipes! Since this recipe's proportions is meant for a batch of mini-cupcakes, I ended up with too much batter (and that was with eating a lot of it). Easy solution, keep them in the freezer until your next batch of slutty cupcakes. Or, if you feel a craving coming on, move them from the freezer to the fridge and just pop them in.. not that I'm speaking from experience, or anything.

Lastly, the frosting! I used this recipe from the famous Magnolia Bakery in NYC, scaled to 3/4 instead of a full batch. However, because the cupcakes are so sweet to begin with (and I have a sweet tooth not to be reckoned with) AND you are going to be adding in crushed Oreos, I would recommend starting out on the low end of the sugar scale. As for how many Oreos you want, start with 6-8 Oreos and go with what your tastebuds' instinct!

Alright, drooling yet? Get to the kitchen! I promise to be back to you later this week with some peanut butter banana muffins and then later this month with PB & Choco Slutty Brownies!


13 May 2012

Thai Noodle Soup

Hello, my invisible internet friends! I'm reporting in from the ranch, back in MA. I threw together some ingredients the other day and created one of my best Thai concoctions. It was so easy, I almost didn't think to blog it, but since I'm still dreaming about it, I figure I should! It's very simple and I suspect very versatile. Feel free to play around with curry amount, type, and adding in some protein!

Thai Noodle Soup
Yields 4 bowls or 2 hearty stomachs

Ingredients

  • 1/2 c full fat coconut milk
  • 2 c vegetable broth (or 2 c water + 2 tbs vegetable bouillon, like I did) 
  • 1 1/2 to 2 tbsp red curry paste
  • 1 tbsp Thai herb blend (I found a little tube of this nifty stuff with the fresh herbs, see if your grocer sells it too! If not, consider adding in garlic, and maybe some cilantro and a little lemongrass.)
  • 1/2 Vidalia or sweet onion, sliced thinly
  • 4 cups fresh spinach, roughly chopped
  • 1/2 red pepper, chopped into 1/2" pieces
  • 2 squash (I used a mix of zucchini and summer squash), sliced thinly
  • 1 to 1 1/2 c of (fine) rice vermicelli
  • Water for boiling
  • 1 tbsp Extra virgin olive oil
Directions
  1. In a medium sized sauce pan on medium heat, mix together the coconut milk, broth, curry paste, herb blend, and zucchini. Be sure to give this a stir occasionally.
  2. In a medium sized skillet on medium heat, add olive oil. Once heated, add onions. Allow them to sweat and even begin to caramelize. 
  3. Once onions start caramelizing, add in the chopped spinach and let them wilt. In the sauce pan, add the squash and give the mix a stir, making sure the squash aren't just floating around at the top.
  4. When the spinach is wilted and the onions have browned, add them to the broth mixture in the sauce pan.
  5. In a new sauce pan, boil water. Once boiling, cook the rice vermicelli according to the package. (Mine recommended cooking it for 2-3 minutes and rinsing it in cold water for a minute. I would recommend 3-4 minutes in the boiling water, rinsing it with cold water, and then allowing it to finish cooking in the broth.) If you don't have rice vermicelli or another long, Asian noodle, I would recommend adding in a long, Italian noodle (e.g., angel hair or linguine) over serving it with rice. I'm afraid rice would get lost in this soup. 
  6. Serve fresh! Optional, but mighty tasty, garnishes include chopped peanut, Thai basil, and a squeeze of fresh lime. 


09 May 2012

Baked Tomatoes with Butter Beans and Herbs

You guys. Something magical just happened in my kitchen. Magical and crazy, but totally delicious.

I have had two little tomatoes chilling in my fridge, looking for a home and I was at a loss of inspiration, but then this little post came along. Not only did I have the tomatoes, but I had fresh herbs on hand, too! I have had great success in the past with recipes from Spoon Fork Bacon, so I had a good feeling about this recipe.

Since I only had 2 tomatoes (versus the 8 that are called for), I winged the measurements given the reduced portion. I also added some leftover butter beans I had to the breadcrumb mix and mashed them up. 


The end result? Delicious! Oh, and what's that little guy hanging over on the right side? Well, that my friends would be a savory pancake! I overestimated how much stuffing I could put in the tomatoes, so then I added an egg and probably a quarter of a cup of shredded cheese and fried it up like a pancake. Once it was light and fluffy, I plopped it down on the plate with a dollop of pesto. 

Guys, I don't know which part of this recipe I liked best, but I'll definitely be playing around with the idea of baked (and stuffed) tomatoes and savory pancakes in the future!

Enjoy!

28 April 2012

Blog Love: Honey Whole Wheat Banana Bread

This week, I found myself with a few bananas that I hadn't managed to get to before they turned brown. Although I have a slew of banana-containing cookie and cupcake recipes that I have bookmarked, I decided to use these bananas to try out a rather wholesome banana bread recipe, particularly since I recently fell victim to slutty brownies.. yet again.

So for this week's "blog love", I recommend you all check out Cookie and Kate's blog. I used her banana bread recipe, but I plan on making many other of her recipes in the future. Her blog is full of healthy, but flavorful ideas accompanied by really exceptional, clean looking photography.

As for the banana bread, the only change I made to the recipe was really an addition of raisins, because to me, banana bread just seems barren when there are no raisins involved. Anyway, I highly recommend you take some time (maybe 10 minutes max in prep time) to whip together this bread and then enjoy a slice of it, warm, with a pad of butter or a smear of peanut butter!


Happy eating!

21 April 2012

Strawberry Rhubarb Crumble

In Tuesday's Village Acres' CSA shared, I received my first few stalks of rhubarb for the season and today seemed like the perfect time to use them! I had strawberries that had been ripening away in my refrigerator and was full from a dinner of wild rice, pesto, and tofu, with little intention of wanting to eat batter (a rare occasion), so off to the blogs I went!

I decided on using smitten kitchen's recipe, because I had almost all of the ingredients to begin with and in close to the quantities called for. I now am completely out of white sugar, light brown sugar, and butter, but I'd call that a successful baking session! A few edits were made to the recipe, however.
  • I used a glass Pyrex dish (not quite a 9"x13", so whatever is next smallest) that was not specifically "deep dish" with no problems. I did put the Pyrex on top of a baking sheet in case there was some bubbling over, but I seem to have been spared any messes!
  • I used dark brown sugar, because I didn't have any turbinado sugar.
  • I had no lemon, so there was no lemon in the topping or filling. In the filling I did go with a splash of orange juice instead of the lemon juice to add some citrus. If there were Gran Marnier in the apartment, I probably would have tried subbing that in for some tang and citrus. (Boozy fruit, who doesn't approve!?)
  • I added a few dashes of cinnamon and and just a smidge of ginger to the filling for a little extra flavor burst.
  • I didn't have any cornstarch, so I went with just over a tablespoon of flour to toss the fruit in.
Despite the number of little substitutions I took and liberty I used in making this (okay, I didn't measure any of the fruit.. or sugar..), it turned out pretty spectacular looking! Now I'm just deciding whether I want to make fresh whipped cream for it or if I should go out and buy some local, fresh ice cream!


Happy weekend everybody! Hope you find a chance to make a crumble (or crisp, if you will) in the near future with all of the fruits just coming into season!

19 April 2012

Pesto doesn't mean pasta!

Alright, let's start off by admitting I had an absolute fail when it came to saying that I was about to post more regularly, because that clearly didn't happen.

I do think I have since come up with two ways that will keep me better accountable to keeping this little diddy updated. However, I am going to need some help, my imaginary audience! First, I hope to post pictures throughout the week of the more put together dishes and whenever you like what you see, you comment on it and request that I write up a recipe for it! Bam! How do you like that?

Secondly, and what has inspired this post, is the idea of "blog love" which entails posting one recipe once a week that features a recipe created by some other food blogger that I admire. This idea struck me as genius when I came across it earlier today on Heather's Dish. Heather was posting about this addictive spinach pesto recipe that she's currently infatuated with and that I knew I had to make.

It's really perfect timing for a pesto what with summer on its way and all sorts of green veggies about to appear. Really, I've had great success in the past making pesto with the traditional basil, but also spinach, garlic scape, kale, broccoli, and even asparagus! Not only that, but pesto should not be restricted to just pasta. I think it's a great addition to breakfast, really. Try it on a fried egg sandwich, in your scrambled eggs, even add a little touch to your hashbrowns!

So I broke out the big guns (thanks, Sean!) and here we have it, some garlicky spinach pesto! Just a few notes to follow on this recipe and how I approached it.


  • I used 1/3 c good quality, organic olive oil and probably could have used even less! 
  • I toasted the walnuts on the stove top, but putting it under the broiler could also work! (I've never tried using the microwave for toasting nuts, though.)
  • I went for double the amount of garlic and half the amount of onion. In the future, I might scale back on the amount of garlic from a full doubling of garlic, not because I don't love garlic, but because it might come off as just a bit abrasive too non-garlic lovers (not that those exist, or anything)! 
  • I only included half the amount of cheese. Using the recommended amount (1/2 c) would probably balance out the extra garlic I included just perfectly, but I was trying to make it just an eensy bit healthier. Go figure.

Alright then, happy eating to you all on this gorgeous Thursday. I vow to check back in very shortly!